Elbow Strengthening
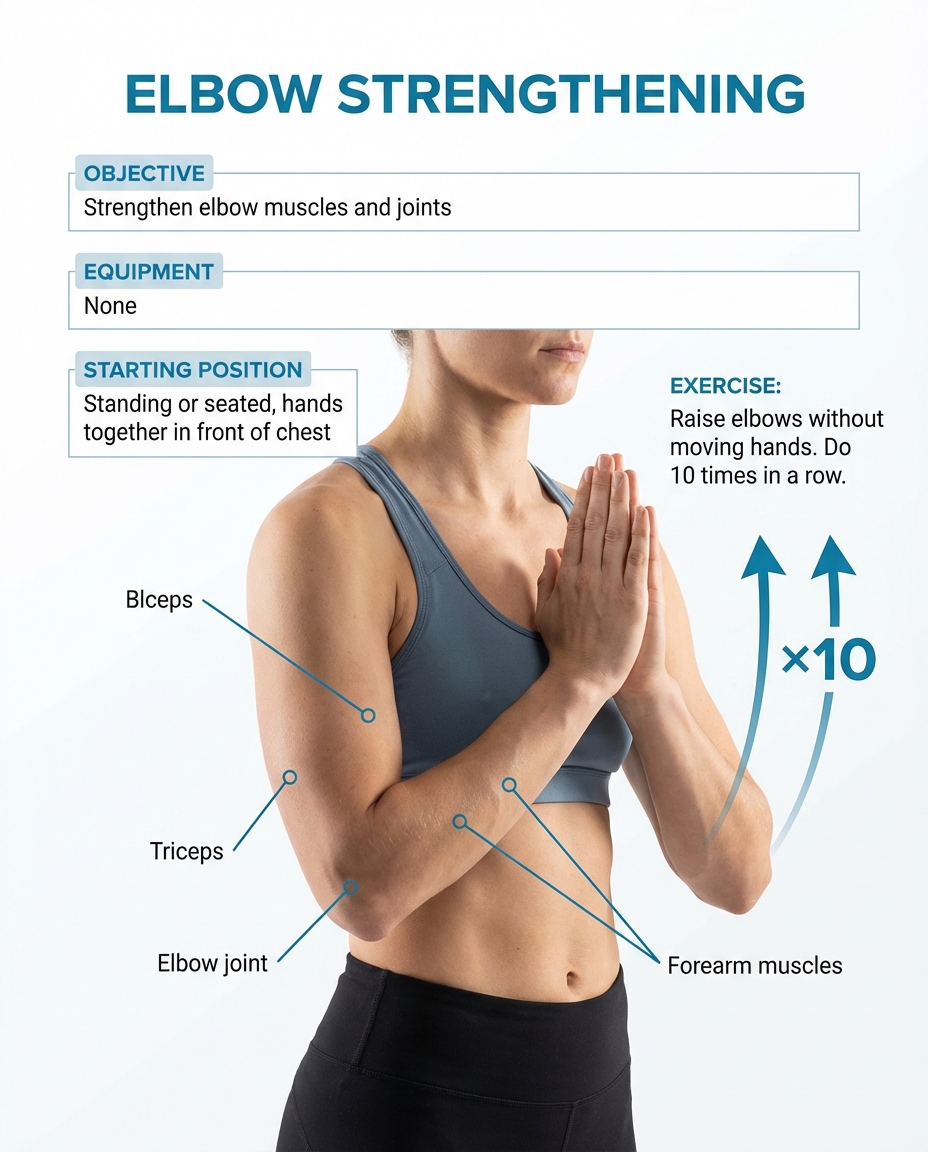
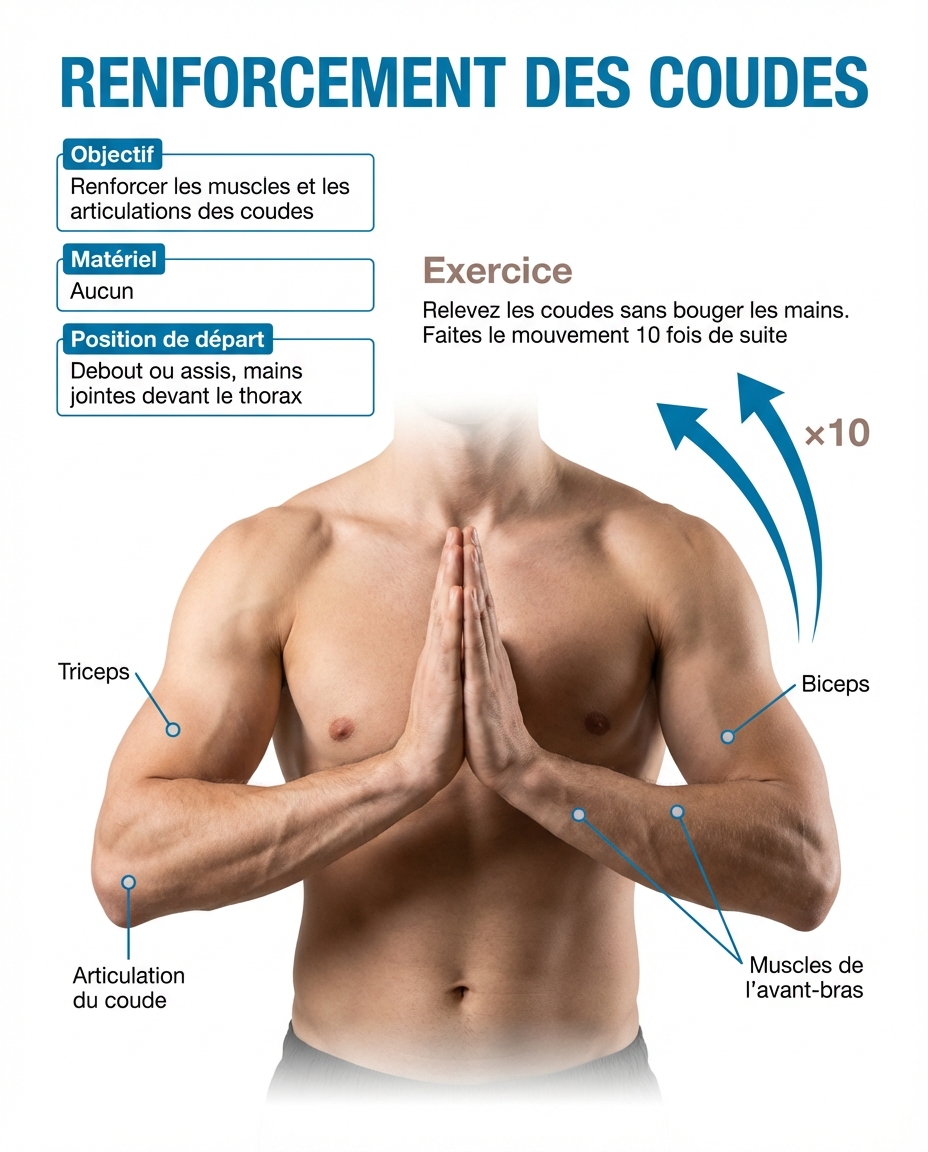
Elbow strengthening exercise: hands joined in front of the chest, raise elbows 10 times to strengthen triceps, biceps and joint stabilizers.

Elbow Strengthening — Joined Hands and Elevation
Elbow strengthening through the joined hands exercise is a gentle isometric technique that simultaneously engages the flexor and extensor muscles of the elbow. By joining your hands in front of the chest and raising the elbows, you create internal resistance that strengthens the joint without external load. It is an exercise of choice for prevention and rehabilitation of elbow pain.
Why Strengthen the Elbows?
The elbow is a complex joint combining three types of movement: flexion-extension, pronation-supination, and lateral stabilization. People suffering from tennis elbow, golfer's elbow, or recurrent joint pain benefit from targeted strengthening that stabilizes the joint and reduces tendon stress. The joined hands exercise is particularly valuable because it creates balanced isometric contraction between agonists and antagonists, improving protective muscle coactivation.
Anatomy Involved
- Triceps brachii — the main elbow extensor, three-headed, located at the back of the upper arm.
- Biceps brachii — main elbow flexor and forearm supinator.
- Forearm muscles — pronators, supinators, and stabilizers involved in maintaining the joined hands position.
- Elbow joint — humero-ulnar (flexion-extension), humeroradial (stabilization), and proximal radio-ulnar (pronation-supination).
- Deltoid and rotator cuff muscles — participate in elevation and shoulder stabilization during the movement.
Step-by-Step Instructions
Step 1 — Starting Position
Stand or sit with your back straight. Join your hands in front of your chest, palm against palm, fingers firmly interlaced. Elbows are at shoulder height, pointing to the sides, forearms parallel to the floor.
Step 2 — Isometric Pressure
Press your palms together with moderate force. You should feel the arm, forearm, and chest muscles contract. Maintain this pressure throughout the exercise.
Step 3 — Elbow Elevation
While maintaining palm pressure, raise your elbows upward in an arc, keeping hands joined at the center. Lift the elbows as high as possible without shoulder pain. The hands stay at chest level — only the elbows move. Slowly lower back to horizontal position.
Step 4 — Repetitions
Perform 10 slow, controlled elevations. Each lift takes about 2 seconds, the descent 2 seconds. Keep the isometric pressure constant between the palms.
Step 5 — Sets and Rest
Rest for 30 seconds by shaking your arms, then perform a second set of 10 repetitions. For advanced levels, add a third set.
Duration and Repetitions
- Repetitions: 10 per set
- Sets: 2 to 3
- Rest between sets: 30 seconds
- Total duration: approximately 5 minutes
- Frequency: 3 to 5 times per week
Safety Tips
- Palm pressure should be firm but not maximal — aim for about 50% of your strength.
- If you feel pain in the elbow or shoulder during the exercise, reduce the elevation range.
- Keep shoulders low and relaxed — do not shrug them toward your ears.
- Breathe normally throughout the exercise — do not hold your breath.
- In case of acute epicondylitis, wait for the inflammatory phase to resolve before practicing.
Who Benefits from This Exercise?
This strengthening suits anyone wishing to stabilize the elbow joint: athletes for prevention (tennis, golf, weight training), people rehabilitating post-tendinitis, manual workers, and elderly individuals wanting to maintain arm strength and mobility. The exercise requires no equipment and can be practiced anywhere, making it an excellent daily maintenance exercise.
Diagrams and illustrations
Elbow strengthening illustration
Hands joined in front of chest with elbow elevation for isometric strengthening.